






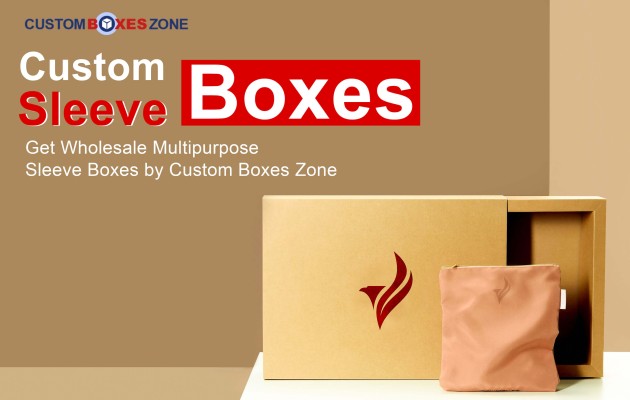
A sleeve box is one of the few packaging structures that people recognise before they can name it. Pull the tab on a phone box, slide a chocolate bar out of its outer wrap, open a subscription box that reveals its contents in one smooth motion, and you have used one.
It is also one of the structures most often specified badly, because the part that determines whether it works is invisible in a design file. This guide covers what the structure is, when it beats the alternatives, and the three technical decisions that decide whether your finished boxes slide properly or end up in a warehouse as a write-off.
What a Sleeve Box Actually Is
The structure has two separate components.
The tray holds the product. It is usually a folded carton with four walls and a base, though it can also be built rigid. It has no lid, because the sleeve performs that job.
The sleeve is a band of board wrapped and glued into a loop, open at both ends. The tray slides into it. There is no closure, no tuck flap, no glue on the finished package. The sleeve stays on through friction alone.
That is the entire mechanism, and it is also why the structure lives or dies on one measurement.
Full Sleeve Versus Belly Band
Worth separating two things people often conflate.
A full sleeve covers the whole depth of the tray. This is the structure most people mean by a sleeve box, and it gives you a complete printable surface on all four sides.
A belly band is a narrow sleeve, often only a third of the tray's height, that wraps the middle. It uses far less board, so it costs less, and it is common when the tray itself is already printed and the band just carries branding or seasonal messaging. Belly bands are also the practical way to add a limited-edition or promotional wrap to existing stock without reprinting the entire carton.
The Friction Fit: The Detail That Decides Everything
If you take one thing from this guide, take this.
A sleeve holds on by friction. That means the internal dimensions of the sleeve and the external dimensions of the tray have to sit within roughly half a millimetre to one millimetre of each other. Outside that window, one of two things goes wrong.
Too tight and the tray will not slide without force. Forcing it scuffs the print on both components, buckles the tray walls, and on laminated stock can lift the film at the edges. Your packing line slows down, and your operators start damaging product to get boxes closed.
Too loose and the sleeve slides off in transit. You discover this when a retailer calls to say half a case arrived with the sleeves at the bottom of the carton and the trays loose.
The tolerance is affected by things that never appear in a design file: the caliper of the board, whether you have laminated (which adds thickness), how the tray corners are constructed, and whether the sleeve is glued with an overlap seam or a butt seam.
This is why a physical sample matters more on a sleeve box than on almost any other structure. A flat proof or a 3D render cannot show you whether a sleeve slides correctly. Only a made sample can.
Grain Direction
The second technical point, and one that seldom gets discussed at the quoting stage.
Paperboard has a grain, running in the direction the fibres are aligned during manufacture. Board folds cleanly along the grain and resists folding across it.
A sleeve is a continuous wrap with four folds around a rectangle. If the grain runs the wrong way relative to those folds, the sleeve does two things: the creases crack along the fold lines, particularly on heavier or laminated stock, and the whole sleeve develops a slight bow so it no longer sits square on the tray.
On a printed tuck carton this matters less, because the panels are smaller and the structure is glued. On a sleeve it shows immediately, because the sleeve is a single continuous loop with nothing holding it square except the board itself.
Any competent packaging manufacturer will lay the die-line out with the grain running correctly for the fold pattern. It is worth asking the question, because a supplier who cannot answer it is imposing the sheet on a standard layout rather than laying it out for your job.
Tray Construction
Three approaches, at different price and protection levels.
Folded tray is cut and creased from a single sheet, then glued at the corners, usually in cardboard between 18pt and 24pt. The most economical option and sufficient for most retail products. Ships flat and assembles quickly.
Corrugated tray uses E-flute for products that need crush resistance, or where the sleeve box doubles as a shipper without an outer carton. Adds noticeable strength for a small cost increase. See corrugated options.
Rigid tray is chipboard, typically 1200gsm and up, wrapped in printed paper. It does not collapse; it holds shape indefinitely, and it gives you the weight in the hand that customers associate with expensive products. This is what luxury cosmetics and premium electronics use. Costs more and ships assembled rather than flat, so factor in the freight difference. Available through our rigid packaging range.
One structural detail worth specifying: a thumb notch, a small semicircular cut in the sleeve or tray wall that lets the customer push the tray out with one finger. Without it, a well-fitted sleeve can be genuinely difficult to open, and the customer ends up shaking the box or prising at it with a fingernail. It costs nothing to add at die-line stage and cannot be added afterwards.
When a Sleeve Box Is the Right Choice
Sleeve boxes are not universally better than a tuck carton. They are better for specific reasons.
When the opening matters. A tuck carton opens by bending a flap. A sleeve box opens by sliding, which is slower, more deliberate, and produces a reveal. If your product is a gift, a premium item, or something customers photograph, that difference is worth paying for.
When you want two printable surfaces. The sleeve is what the customer sees on the shelf. The tray is what they see when it opens. Printing the tray interior costs relatively little and gives you a second moment to communicate, whether that is a message, care instructions, or a reorder code.
When you run seasonal or limited variants. Because the sleeve and tray are separate components, you can keep one tray specification and print multiple sleeve designs against it. A brand running four seasonal variants prints one tray at full volume and four shorter sleeve runs, which is considerably cheaper than four separate cartons.
When the product needs to sit flat and visible. Trays present the contents face up. A tuck carton empties its contents. For anything arranged in a set, the tray keeps the arrangement intact.
Sleeve boxes are the wrong choice when you need a tamper-evident seal, when the product is heavy enough to stress a friction fit, or when packing speed is your main constraint, since sleeving is slower than closing a tuck flap.
Products That Suit the Structure
The structure works well across a wide range. Custom sleeve boxes are commonly used for cosmetics and skincare sets, where the tray holds several items in fitted positions. Confectionery and chocolate, where the sleeve carries the branding, and the tray presents the product. Technology accessories, where the reveal supports a premium price point. Apparel items like scarves, ties, and pocket squares. Subscription boxes, where the same tray spec carries a new sleeve design each month. Candles and home fragrance, where the tray protects glass and the sleeve does the selling.
Print and Finish Considerations
The sleeve is your primary surface, so it takes most of the design budget. A few things specific to this structure.
Watch the glue seam. A sleeve is glued along one edge, and that seam sits somewhere on your design. Place it on a back panel or an edge rather than through the middle of your logo. Your die-line will show where it falls.
Avoid heavy ink coverage at the sliding edges. Thick ink laydown at the openings takes the most abrasion each time the tray moves. Lighter coverage in those zones wears better over the box's life.
Consider the contrast between components. A common and effective approach is a printed sleeve over a plain or single-colour tray, often kraft or black. It costs less than printing both, and the contrast reads as deliberate.
For finishing, matte lamination hides handling marks and is the most common choice. Gloss saturates colour for shelf impact. Soft-touch is particularly effective here, because the customer's hands are on the sleeve during the slide, so they feel the finish at the exact moment the box opens.
One caution: heavy lamination adds measurable thickness. If your sleeve was toleranced on uncoated caliper and you then laminate both components, the fit tightens. Specify the finish before the die-line, not after.
Foil stamping, embossing, and spot UV all work on sleeves, with the usual caveat that embossing across a fold line will distort the crease.
Material Options
Cardboard from 18pt to 24pt is the standard for both components in retail. Prints cleanly, creases well, economical at volume.
Kraft in brown, white, or black suits natural and artisan positioning. Worth knowing that kraft's surface texture is slightly higher friction than coated board, so a kraft sleeve on a kraft tray grips more than the same dimensions in coated stock.
E-flute corrugated where crush resistance matters or the box ships alone.
Rigid chipboard for premium, as covered above.