






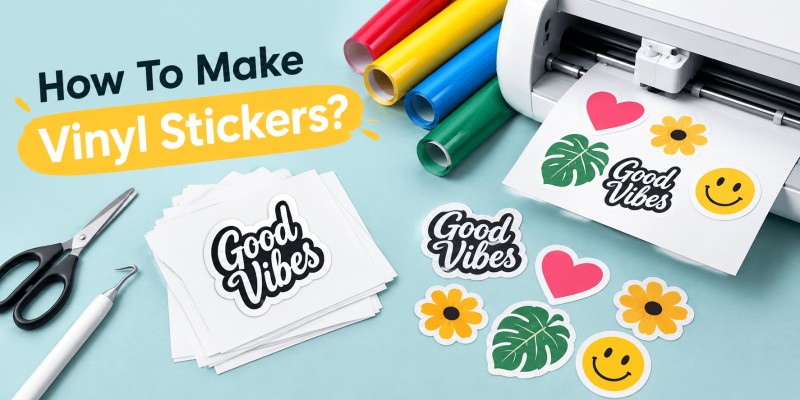
Vinyl stickers have become one of the most popular ways for businesses, artists, and hobbyists to express creativity, promote a brand, or simply have fun with custom designs. Whether you're a small business owner looking to boost brand visibility or a DIY enthusiast wanting to personalize your laptop, water bottle, or car, learning how to make vinyl stickers is a valuable skill. In this guide, we'll walk you through everything you need to know from choosing the right materials to printing, cutting, and applying your stickers like a pro.
What Are Vinyl Stickers?
Vinyl stickers are adhesive labels made from a durable, flexible plastic material called vinyl. Unlike paper stickers, vinyl stickers are waterproof, weather-resistant, and long-lasting, making them ideal for both indoor and outdoor use. They're commonly used for branding, packaging, product labeling, car decals, laptop skins, and promotional giveaways.
Their popularity comes from their durability and versatility. A well-made vinyl sticker can survive sun exposure, rain, and scratches for years without fading or peeling, which is why so many businesses and individuals rely on them. Unlike regular paper labels that tear or smudge easily, vinyl holds its shape and color even after repeated handling, washing, or exposure to changing weather conditions.
Why Choose Vinyl Over Other Sticker Materials?
Before diving into the process, it's worth understanding why vinyl is often the go-to choice over other sticker materials like paper, polyester, or PVC film.
- Durability: Vinyl resists water, UV rays, and scratches, which means it won't peel or fade quickly even when used outdoors.
- Flexibility: It can bend and stretch slightly, making it easy to apply on curved surfaces like bottles, mugs, and car bumpers.
- Professional Finish: Vinyl gives a glossy or matte look that appears polished and clean, which is important for brand image.
- Longevity: High-quality vinyl stickers can last anywhere from 3 to 7 years outdoors, depending on the laminate and adhesive used.
- Cost-Effective for Bulk Production: Once you have the right equipment, producing vinyl stickers in bulk becomes cheaper per unit compared to other printing methods.
Compared to paper or standard printer stickers, vinyl is far more resilient, especially for products that will be handled frequently, washed, or exposed to sunlight and moisture over time.
Materials and Tools You'll Need
To make professional-quality vinyl stickers, you need the right combination of materials and tools. Investing in good-quality supplies from the start will save you time, reduce waste, and give you a much more polished final product.
Essential Materials
- Vinyl Sheets or Rolls: Available in glossy, matte, or clear finishes and in different thicknesses depending on the intended use.
- Transfer Tape: A sticky paper or film that helps move the design from its backing sheet to the final surface without distorting the shape.
- Laminate Sheets: Adds an extra protective layer against water, UV rays, and physical scratches, extending the sticker's lifespan significantly.
- Adhesive Backing: Comes in permanent or removable options, depending on whether the sticker needs to stay in place long-term or be repositioned later.
Tools Required
- Vinyl Cutting Machine: Popular options include Cricut, Silhouette Cameo, or a professional-grade plotter for bulk orders. These machines use a small blade to precisely cut your design out of the vinyl sheet.
- Design Software: Adobe Illustrator and CorelDRAW are industry standards for precise vector artwork, while free tools like Inkscape and Canva work well for beginners.
- Weeding Tools: Small hooks, picks, or tweezers used to remove excess vinyl after cutting, especially important for designs with small or detailed elements.
- Squeegee: A flat tool used to smooth out the sticker during application, removing air bubbles and ensuring even adhesion.
- Printer (if printing designs): An inkjet or laser printer compatible with vinyl sheets is needed for full-color, detailed designs; for bulk or professional runs, a print-and-cut machine combines printing and cutting in one device.
Choosing the Right Vinyl Material
Not all vinyl is the same, and picking the correct type has a major impact on how your sticker performs and how long it lasts.
Indoor vs. Outdoor Vinyl
Indoor vinyl is typically thinner and more affordable, making it suitable for short-term use such as promotional stickers, event giveaways, or temporary labeling. Outdoor vinyl, on the other hand, is thicker, more UV-resistant, and built to withstand rain, sunlight, and temperature changes, making it the better choice for car decals, storefront signage, and product packaging that will be exposed to the elements.
Glossy vs. Matte Finish
Glossy vinyl reflects light and produces a vibrant, eye-catching look, which works especially well for bold logos and colorful designs meant to grab attention. Matte vinyl, in contrast, offers a subtle, non-reflective finish that gives a more premium, minimalist appearance often preferred for upscale branding or product packaging where a softer aesthetic is desired.
Permanent vs. Removable Adhesive
Permanent adhesive vinyl is designed for long-term applications like branding, product labels, or car decals that shouldn't move or peel off over time. Removable adhesive vinyl is better suited for temporary promotions, seasonal window displays, or any application where you might want to change or update the design later without damaging the surface underneath.
Understanding Sticker Sizes
Size plays a significant role in how your sticker looks, functions, and fits its intended purpose. Choosing the wrong size can make a design look cramped, oversized, or simply out of place.
Small stickers, typically ranging from 1 inch by 1 inch to 2 inches by 2 inches, work well for laptop decorations, packaging seals, or small branding elements like a logo tucked into the corner of a box. Medium stickers, between 3 inches and 4 inches, are the most commonly used size for product labels, business logos, and promotional giveaways, since they're large enough to be legible without overwhelming the surface they're placed on. Large stickers, 5 inches and above, are ideal for car decals, wall art, or storefront displays where visibility from a distance matters.
When choosing a size, consider where the sticker will be placed and how visible it needs to be. For branding purposes, a size between 2 and 4 inches usually works best for balancing visibility with practicality. If you're producing custom stickers for packaging or retail products, it's important to match the sticker size with your box or label dimensions to maintain a consistent, professional look across your entire product line.
Step-by-Step Process to Make Vinyl Stickers
Now let's go through the complete process of creating your own vinyl stickers from start to finish, covering every stage in detail.
Design Your Sticker
Start by creating your design using software like Illustrator, CorelDRAW, Canva, or Inkscape. Use high-resolution images of at least 300 DPI so the final print looks sharp rather than blurry or pixelated. Keep text legible and avoid making it too small, since tiny fonts can become unreadable once printed at sticker size. Whenever possible, work with vector files such as SVG or AI formats, since these produce cleaner, more precise cutting lines compared to raster images like JPG or PNG. It also helps to leave a small border around your design, which makes weeding and cutting easier later in the process.
Choose Your Vinyl Type
Based on the sticker's purpose, whether it's for indoor or outdoor use, and whether you want a glossy or matte look, select the appropriate vinyl sheet or roll for your project. Making this decision early prevents wasted material and ensures the finished sticker performs the way you need it to.
Print the Design (If Applicable)
If your design includes multiple colors or detailed artwork, print it onto printable vinyl using an inkjet or laser printer designed for vinyl material. Make sure the ink is fully dry before moving to the next step, since smudged or wet ink can ruin the cutting process and leave streaks on the final sticker.
Load Vinyl Into the Cutting Machine
Place the vinyl sheet onto the cutting mat and load it into your machine, whether that's a Cricut, Silhouette, or a professional plotter. Adjust the blade depth and pressure settings according to the thickness of your vinyl, since cutting too deep can damage the backing sheet, while cutting too shallow can leave the design only partially separated.
Cut the Design
Upload your design file into the machine's software and start the cutting process. The machine will trace the outline of your design and cut through the top vinyl layer without cutting through the backing paper underneath, allowing you to peel away only the parts you don't need.
Weed the Excess Vinyl
Using a weeding tool, carefully remove the unwanted vinyl around your design, leaving only the sticker shape on the backing sheet. This step requires patience and a steady hand, especially for intricate designs with small text or fine details, since rushing can tear the vinyl or distort the shape.
Apply Transfer Tape
Place transfer tape over the weeded design and press firmly using a squeegee to ensure it sticks properly to the vinyl. This tape allows you to lift the entire design as one piece and apply it accurately to the final surface, rather than trying to position dozens of tiny pieces individually.
Apply the Sticker to the Surface
Peel the backing paper away slowly, then position the sticker, still attached to the transfer tape, onto your desired surface. Use the squeegee again to press out any air bubbles, working from the center outward toward the edges to ensure a smooth, even application.
Remove the Transfer Tape
Once the sticker is firmly applied and you're confident there are no air bubbles left, gently peel off the transfer tape at a low angle, leaving the vinyl design securely in place on the surface.
Add Lamination (Optional)
For extra durability, especially for stickers headed outdoors, apply a laminate sheet over the finished sticker. This adds a protective layer that guards against scratches, sunlight, and moisture, significantly extending the life of the sticker.
Tips for Making High-Quality Vinyl Stickers
Always test your cut settings on a small vinyl scrap before running a full design, since different vinyl thicknesses and machine models require slightly different blade depths and pressure. Use a sharp blade to avoid jagged or torn edges, and replace it regularly since a dull blade is one of the most common causes of poor-quality cuts. Store vinyl rolls in a cool, dry place away from direct sunlight to prevent warping or curling before use. For bulk orders, consider working with a professional custom sticker printing service, which can save significant time and ensure consistent quality across large quantities. Finally, choose a UV-resistant laminate for any stickers that will be placed outdoors, since this single step can double or triple the sticker's usable lifespan.
Common Mistakes to Avoid
Using low-resolution designs is one of the most frequent mistakes, leading to blurry or pixelated prints that look unprofessional. Incorrect blade depth is another common issue, often resulting in torn vinyl or a backing sheet that doesn't fully separate from the design. Skipping the test cut wastes material if your settings turn out to be wrong, so it's always worth the extra few minutes. Ignoring the difference between indoor and outdoor vinyl types is another costly mistake, since using indoor-grade vinyl outdoors will cause it to fade or peel much faster than expected. Finally, rushing the application step often leads to air bubbles and uneven placement, which can ruin an otherwise perfectly cut and weeded sticker.
Final Thoughts
Making vinyl stickers is a rewarding process that combines creativity with technical skill. By choosing the right materials, understanding size and finish options, and following a careful step-by-step process, you can create professional, long-lasting stickers for branding, personal projects, or business promotions. Whether you're printing a handful of custom designs or scaling up for bulk orders, mastering these basics will help you produce vinyl stickers that truly stand out and hold up over time.